
Last updated October 9, 2026
Seasonal tune-up and full diagnostic on your Carrier, Trane, or Goodman system - readings shown to you before any repair is proposed
Diagnosis first, numbers second - you approve the repair price before a single part goes in.
 Before
 After
After Before
 After
After Before
 After
AfterHeat Pump Installation Troubleshooting: Common Problems and How to Fix Them
Here’s a fact most heat pump manufacturers won’t print in the brochure: when a newly installed heat pump misbehaves in its first season, the equipment itself is rarely the culprit. In Los Angeles, where we install and service heat pumps from the Valley to the Westside, we consistently find that roughly three out of four early failures trace back to the installation on the ground, not the unit on the pad. Refrigerant undercharge is the single most common installation defect we see, and it’s a silent one. The system runs, the house eventually cools or warms, and the homeowner never knows they’re paying a 15 to 20 percent efficiency penalty every single month until a compressor fails years early. This guide walks through the Heat Pump Installation Warning Signs Every Homeowner Should Know that point to installer error, how to verify each one, and what a contractor’s written guarantee should actually obligate them to fix, in writing, on a return trip.
Quick Answer
Most our Heat Pump Installation services problems that appear within the first 90 days are contractor-caused: refrigerant undercharge or overcharge, incorrectly sized refrigerant lines, wrong electrical wire gauge, poor airflow from undersized returns, or a condensate drain with improper slope. The fix is not a warranty claim with the manufacturer. It’s a formal written notice to the installing contractor, who is responsible for correcting installation defects on a return trip at no charge under the terms of a written installation guarantee.
Table of Contents
- Refrigerant Undercharge: The Installer’s Signature Defect
- Refrigerant Line Sizing Errors and Their Symptoms
- Electrical Installation: How to Verify the Pull Was Done Right
- Airflow Problems: Undersized Ducts and Returns
- Condensate Drain Issues and Water Damage
- Defrost Cycle Behavior: What’s Normal in Los Angeles
- How to Document a Post-Installation Problem Formally
- Common Mistakes to Avoid
- When to Call a Professional
- Frequently Asked Questions
- The Bottom Line
Refrigerant Undercharge: The Installer’s Signature Defect
A heat pump ships from Goodman, Rheem, York, or Daikin with a factory refrigerant charge sized for a specific length of line set, typically 15 feet. When the installer runs a longer line set, as is common in Los Angeles homes where the condenser sits on the far side of a garage or a rooftop, the system needs additional refrigerant. That addition must be weighed in with a scale. It cannot be guessed by feel, and it cannot be skipped because the technician is behind schedule. When it is skipped, the system runs undercharged. It cools and heats, yes, but it works harder and longer to do it, and the compressor runs hotter than it was designed to.
The five telltale signs of refrigerant undercharge at installation:
- Longer run times to hit setpoint. The thermostat eventually reaches the number, but the system takes noticeably longer than a comparable unit at a neighbor’s house. On a 90-degree Los Angeles afternoon, a properly charged heat pump should cycle off periodically. An undercharged unit runs nearly continuously from mid-morning to sunset.
- Warm discharge air on a mild day. With the system in cooling mode and the outdoor temperature in the low 80s, the air coming from the supply registers should feel distinctly cold, somewhere in the low to mid 50s. Warm or merely cool air on a mild day is a classic undercharge signature.
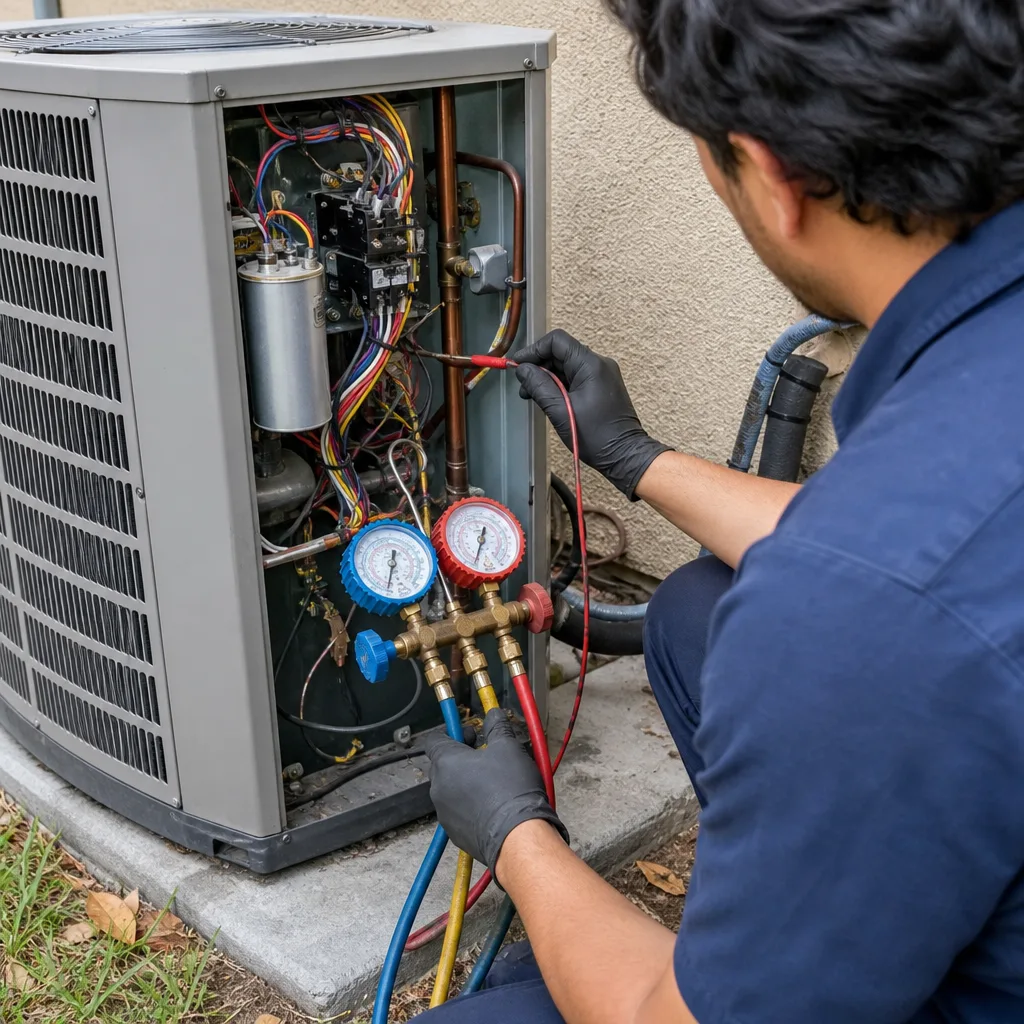
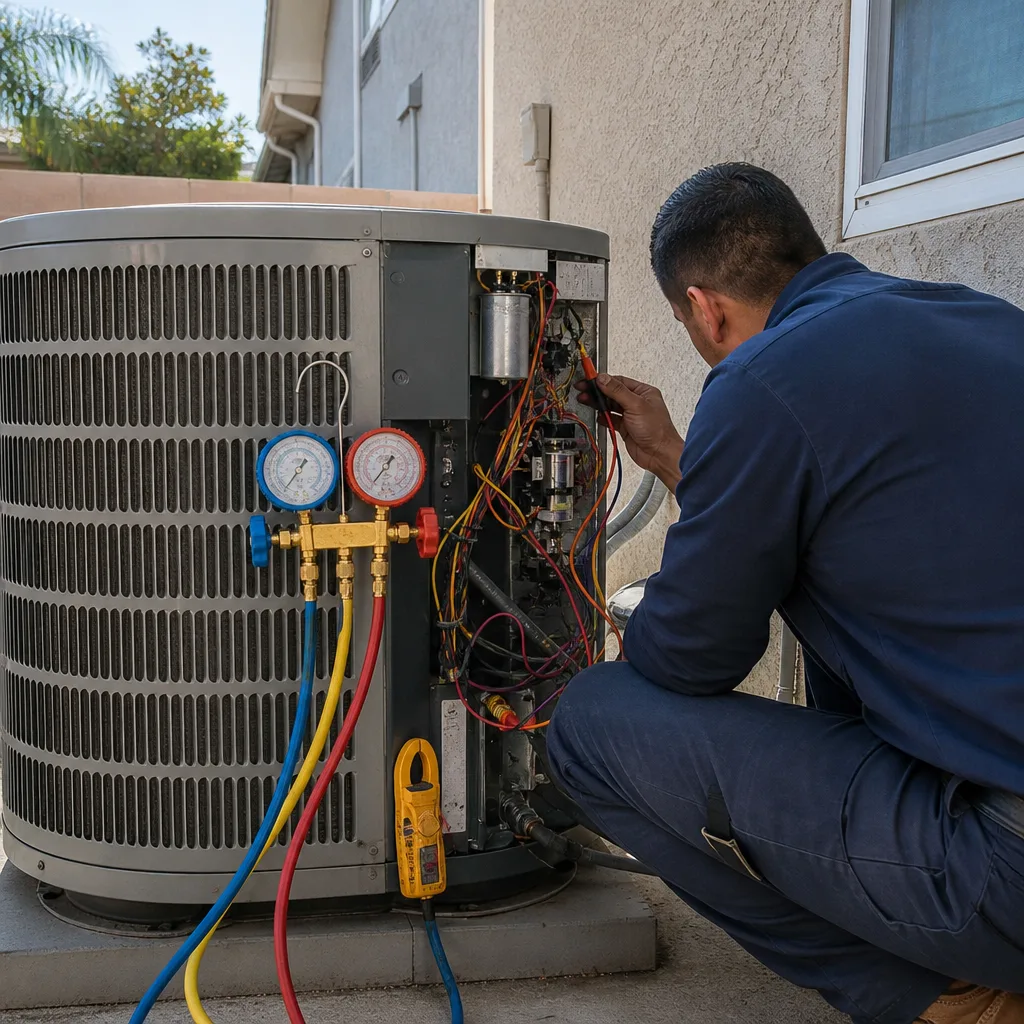
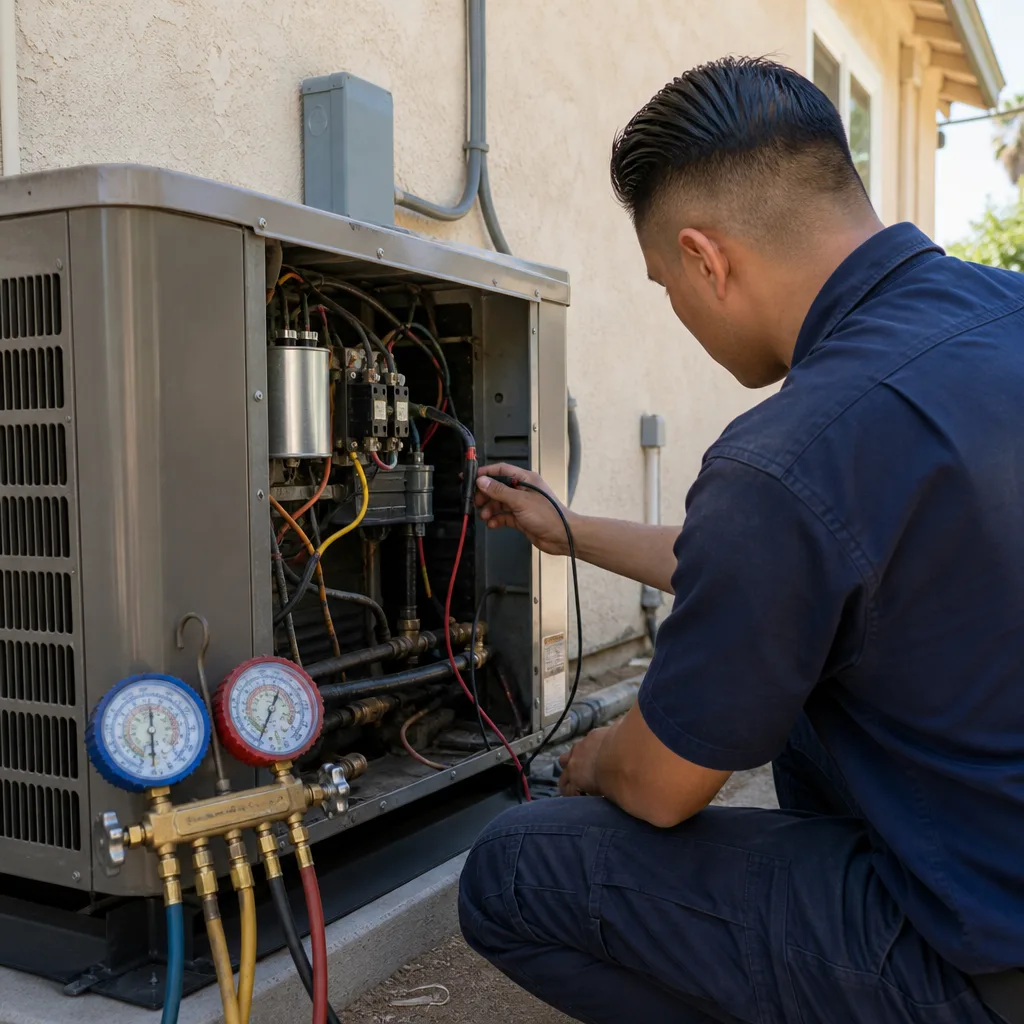
- High superheat readings. A technician measuring superheat on an undercharged system sees numbers well above the manufacturer’s target range. This is the diagnostic smoking gun, and it costs nothing for a qualified tech to check.
- Ice on the suction line. The larger of the two copper lines running to the outdoor unit, the one wrapped in black foam insulation, should never frost over during normal operation. Frost or ice on that line in cooling mode means low refrigerant, low airflow, or both.
- Elevated electricity bills from day one. This is the symptom most homeowners in Los Angeles live with for years. The first full summer bill after installation should be compared against the same billing period from the year before, adjusted for weather. A persistent increase with no change in usage patterns points to a system working harder than it should.
None of these five symptoms trigger an obvious failure. That’s why undercharge goes undetected. A compressor that runs hot for five years eventually fails, and by then the homeowner is outside the installation guarantee window and facing a multi-thousand-dollar repair that the manufacturer may attribute to installation error anyway. If you suspect undercharge, the move is to document the symptoms in writing and request a return visit to weigh and verify the charge. This is not a manufacturer warranty issue. It is an installer correction.
Refrigerant Line Sizing Errors and Their Symptoms
Refrigerant lines are the two copper tubes that connect the indoor air handler to the outdoor condenser. One carries liquid refrigerant to the indoor coil. The other carries vapor back to the compressor. Both lines must be sized according to the manufacturer’s published chart for the specific heat pump model, accounting for total line length and vertical rise. When the installer reuses an old line set from a previous system, a common shortcut in Los Angeles retrofit installations, the sizing may be wrong for the new equipment.
Too-small suction lines create velocity problems. When the vapor line is undersized, refrigerant gas moves through it too fast. That creates pressure drop across the line, which forces the compressor to work harder to maintain the same cooling effect. Symptoms include reduced capacity on hot days, higher than expected power draw, and sometimes an audible hissing or rushing noise at the indoor coil. The system cools, but it never cools quite as well as the spec sheet says it should.
Oversized lines cause oil return failures. This is the less intuitive failure. Compressors rely on lubricating oil that travels through the system mixed with refrigerant. If the suction line is oversized, the refrigerant gas moves too slowly to carry oil back to the compressor. Oil pools in low spots and in the evaporator coil instead. Over months, the compressor runs progressively lower on lubrication until it seizes. The system may work fine for a year or two, then fail catastrophically. Daikin and Rheem both publish specific minimum velocity requirements for their heat pump line sets precisely because of this failure mode.
If a heat pump was installed with reused lines, the contractor should have verified line diameter against the new unit’s specifications and documented that verification. Ask to see it. If they cannot produce the sizing confirmation, that is a legitimate reason to request a refrigerant line inspection on a return visit.
Electrical Installation: How to Verify the Pull Was Done Right
Heat pumps run on high amperage circuits, and the electrical pull is where installers genuinely cut corners, or where a homeowner who hires a separate electrician ends up with a mismatch between the breaker, the wire gauge, and the unit’s minimum circuit ampacity. Getting this wrong is not a comfort problem. It is a fire hazard, and it voids the manufacturer’s warranty.
What you can check at the outdoor disconnect:
- Turn the system off at the thermostat and the breaker. Do not open the disconnect box if you are not comfortable working around electrical panels. This check requires the cover removed and live wires exposed, so call a professional if there’s any doubt.
- Verify the breaker size. The heat pump’s nameplate, usually located on the side of the outdoor unit, lists “Minimum Circuit Ampacity” and “Maximum Fuse or Breaker Size.” The breaker in the panel must be no larger than the maximum listed. A breaker that is too large will not trip when it should.
- Check the wire gauge. For a typical 3-ton heat pump with a minimum circuit ampacity around 25 to 30 amps, the wire should be 10 AWG copper at minimum, and many installations call for 8 AWG. Undersized wire gets warm under load, and warm wire is wasted electricity and a safety risk. The wire gauge is printed on the wire insulation.
- Measure voltage at the disconnect with a multimeter. With the disconnect closed and the system running, you should read within 10 percent of the unit’s rated voltage, which is typically 208 to 230 volts for residential heat pumps in Los Angeles. A reading that drops significantly when the compressor kicks on, called voltage sag, indicates an undersized conductor or a long run from the panel.
- Check amperage draw once running. Compare the measured draw against the nameplate’s rated load. A draw significantly above the rating suggests a mechanical problem, a refrigerant overcharge, or an electrical issue. A draw significantly below suggests undercharge or a compressor that is not loading.
If any of these readings are off, the fix is an electrician’s job, and the installing contractor who pulled the permit is responsible for correcting the circuit to code. In Los Angeles, where many mid-century homes still have older panels, the correct answer is sometimes a subpanel or a service upgrade, not another splice.
Airflow Problems: Undersized Ducts and Returns
A heat pump is a heat mover, and it can only move as much heat as the air flowing across its coils allows. When an installer drops a new, higher-efficiency heat pump onto an existing duct system that was sized for an older, less demanding unit, or worse, when someone closes supply registers in unused rooms to “save energy,” the system chokes. Restricted airflow is one of the most common installation-related problems we see in Los Angeles, where many homes built in the 1960s and 70s have ductwork that was marginal even when it was new.
Symptoms of airflow problems:
- The system short-cycles, turning on and off every few minutes because the coil gets too cold and trips the low-temperature safety.
- Some rooms never reach temperature while others are comfortable, even with the thermostat satisfied.
- The indoor coil freezes over in cooling mode, then thaws and drips water onto the floor or into the return.
- Air noise at the registers is loud, a sign of high static pressure from air being forced through openings that are too small.
- The electric heat strips run constantly in winter even when it’s only mildly cold outside, because the heat pump alone cannot extract enough heat from the restricted air stream.
The correction for undersized returns is usually the addition of a return duct or a larger return grille. It’s not glamorous work, and it’s not the conversation an installer wants to have after the fact, but a heat pump installed on a restrictive duct system will never deliver its rated efficiency or its expected lifespan. The installer should have measured static pressure after installation and recorded it. A proper installation includes an airflow verification as part of the startup checklist. If yours did not include one, ask for it now.
Condensate Drain Issues and Water Damage
Every heat pump produces condensation when it cools, and that water has to go somewhere. In most Los Angeles installations, the condensate drains by gravity to the outside or into a plumbing drain. When the drain line is pitched wrong, run too far without a vent, or simply left uninsulated in a hot attic where the cold water causes condensation on the outside of the pipe, the result is water where it doesn’t belong: stained ceilings, warped drywall, mold in the attic, or a flooded secondary drain pan.
Installation-related condensate problems show up quickly. A drain that was pitched uphill, even slightly, will back up within days and trip the float switch, which shuts the system down to protect the house. A drain that sags in the middle creates a trap that holds water, grows algae, and eventually clogs entirely. In Los Angeles, where many horizontal units sit in hot attics, uninsulated drain lines also sweat and drip onto the insulation below.
If you see water stains near the air handler, or if the system shuts down intermittently with no thermostat error, check the secondary drain pan. If it’s wet, the primary drain is not doing its job. The fix is re-pitching the line, adding a vent, or insulating it, and it is the installer’s obligation under the installation guarantee. This is one of the few post-installation problems where the symptom is visible enough that a homeowner can catch it early and prevent real damage.
Defrost Cycle Behavior: What’s Normal in Los Angeles
Heat pumps have a defrost cycle because in heating mode, the outdoor coil can freeze over even when the air temperature is above freezing. That’s because the coil runs colder than the surrounding air as it extracts heat. When frost builds up, the system briefly reverses into cooling mode, sends hot refrigerant through the outdoor coil to melt the frost, and then resumes heating. This is normal, and it happens on a schedule controlled by a defrost board.
What normal defrost looks like in a Los Angeles winter:
- A brief change in sound from the outdoor unit, often a whoosh or a hiss, lasting two to ten minutes.
- Steam or vapor rising from the outdoor unit while the frost melts.
- The indoor fan slowing or stopping briefly, with the auxiliary heat strips typically engaging to keep discharge air warm.
- The cycle repeating at intervals set by the manufacturer, often 30, 60, or 90 minutes of accumulated run time, and only when the coil temperature and outdoor conditions warrant it.
What abnormal defrost looks like:
- Defrost running every few minutes regardless of outdoor conditions, a sign of a faulty defrost thermostat or a stuck reversing valve, either of which should have been caught at startup.
- Defrost that never happens at all, leaving the coil packed with ice on a 45-degree Los Angeles morning. A unit that ices over in mild conditions usually has a refrigerant problem or an airflow problem, not a defrost problem.
- Defrost that dumps cold air into the house because the auxiliary heat strips were never wired in or were wired incorrectly during installation.
- Water pooling at the base of the unit after defrost because the installer did not level the pad or provide proper drainage. In Los Angeles, where condenser pads settle on expansive soils, this is more common than you’d expect.
If the defrost behavior looks like the normal list, don’t worry about it. If it looks like the abnormal list, the installer needs to come back and check the defrost thermostat, the reversing valve, and the heat strip wiring. None of these are manufacturer defects when they appear in the first season.
How to Document a Post-Installation Problem Formally
Here’s the part nobody tells you: a phone call to the contractor is not documentation. If the contractor disputes that you ever reported the problem, or if the dispute ends up in front of the California Contractors State License Board, what matters is what you can prove in writing. The written guarantee from a reputable company like a Dalton Heating & Air home location spells out exactly what’s covered and for how long, but the homeowner still needs to create the paper trail.
- Write the initial report as an email. Include the installation date, the heat pump model and serial number, and a specific description of the symptom. “System runs constantly and doesn’t cool below 78” is good. “System isn’t working right” is not.
- Attach photos or video. Ice on the line set, water in the drain pan, unusual noises, error codes on the thermostat. Timestamped media is hard to argue with.
- Reference the written guarantee. If the contract includes a written installation guarantee, quote the specific language. “Section 3 of the installation agreement states that installation workmanship is guaranteed for one year.”
- State your expectation. Tell them what you want: a return visit to diagnose and correct the installation defect at no charge, within a specific and reasonable timeframe. Fourteen days is fair in Los Angeles, where good contractors are booked out in peak season.
- Send it to a person, not a general inbox. The salesperson or project manager who handled your installation is the right first contact. Copy the company’s general address if one exists.
- Follow up in writing if the deadline passes. A second email that references the first one, dated and polite, creates the record that the first one was not addressed.
If the contractor does not respond or refuses to fix the issue, the next escalation is the California Contractors State License Board, which handles contractor disputes. That’s a step we hope no homeowner has to take, but a formal written record is what makes a complaint actionable. The Garrison Standard that Dalton Heating & Air locations operate under exists precisely because this kind of documentation is so rare in residential HVAC. The written guarantee is the contractor putting their obligation on paper. The homeowner’s job is to hold them to it.
Common Mistakes to Avoid
- Accepting “that’s normal” without a number attached. It’s normal for a heat pump to run longer than a furnace on a cold morning. It’s not normal for it to run 20 hours a day when it’s 55 degrees outside. Ask for the specific measurement: superheat, subcooling, static pressure, temperature split. A good technician can give you a number.
- Filing a manufacturer warranty claim for an installation problem. Goodman, Rheem, York, and Daikin cover parts defects, not bad line sizing or a skipped evacuation. The warranty claim takes weeks and gets denied when the manufacturer’s rep finds the installer’s fingerprints on the failure. Go after the installer first.
- Reusing the old line set without verification. It’s the biggest line-item shortcut in Los Angeles heat pump retrofits. If the old lines don’t match the new unit’s required diameter, the system fails slowly.
- Closing registers in unused rooms. This increases static pressure, makes the system work harder, and can freeze the coil. The whole point of a heat pump is to move air. Let it move.
- Not comparing electricity bills after installation. A heat pump that replaces a gas furnace will change your electric and gas usage in opposite directions, and the net effect takes a full year of bills to see clearly. But if the summer cooling bill jumps 30 percent with no weather explanation, the charge is wrong or the ductwork is leaking.
- Waiting to report a problem until the next maintenance visit. Installation defects compound. A small refrigerant leak becomes a compressor failure. A slow condensate drip becomes mold. Report issues immediately, in writing.
When to Call a Professional
Some of the checks in this guide can be done by a careful homeowner with a multimeter and a willingness to read the nameplate. Most cannot. If you suspect refrigerant undercharge, if the electrical readings are off, if the defrost cycle is behaving strangely, or if water is appearing anywhere near the air handler, a trained technician with the right tools should be the one to diagnose and correct it. Heat pumps contain high-voltage electrical components and refrigerant under high pressure. Both can hurt you. More to the point, a proper diagnosis requires gauges, temperature probes, and manufacturer-specific service data that a homeowner cannot reasonably access.
Dalton Heating & Air offers free estimates in Los Angeles, including post-installation diagnostic visits where we can verify charge, airflow, and electrical readings against the manufacturer’s specifications. For How Long Does AC Repair Take? Timelines and What to Expect, ask when you call. Call (361) 306-9515 to schedule. If your system was installed by another company, we still do the work, and we’ll write down exactly what we find, in numbers, so you have a record to take back to the original installer.
For more on what a proper installation should include, see our guide to Heat Pump Installation in Los Angeles, or compare notes on our AC Repair in Los Angeles page if the problem is showing up in cooling mode. If you’re also running a furnace as backup, our Furnace Repair in Los Angeles page covers the other side of the dual-fuel equation.
Frequently Asked Questions
A correctly installed heat pump comes with a startup report that includes measured refrigerant charge, superheat and subcooling readings, static pressure, voltage and amperage draw, and a verified defrost cycle test. If you don’t have that report, or if the installer never produced one, you have a legitimate reason to ask for a verification visit.
Constant run time on mild days usually means refrigerant undercharge, restricted airflow from undersized ducts, or a system that is simply oversized or undersized for the home. A properly sized and charged heat pump in Los Angeles should cycle off periodically even during peak summer afternoons.
Light frost on the outdoor coil is normal in heating mode, and the defrost cycle melts it. A thick layer of ice that persists for hours means the defrost system is not working, the refrigerant charge is wrong, or the airflow is restricted. All three are correctable, and the first two are installation issues.
If the problem is an installation defect covered under the written installation guarantee, it should cost nothing. Most genuine installation corrections, refrigerant charge adjustments, drain re-pitches, or electrical corrections, fall under the installer’s workmanship obligation. Parts failures under the manufacturer’s warranty are separate. Always confirm coverage in writing before authorizing work.
No. Refrigerant handling requires an EPA Section 608 certification, and adding refrigerant without fixing the underlying leak or verifying the charge with gauges will make the problem worse. This is a job for a licensed technician with the right equipment.
California law requires contractors to stand behind their work for a minimum of one year, and most reputable companies, including all Garrison Partners locations like Dalton Heating & Air, include a written one-year workmanship guarantee. The clock starts on the installation date, and problems should be reported as soon as they appear, not held until the end of the season.
The Bottom Line
Heat pump installation problems are rarely mysterious, and they’re rarely the equipment’s fault. Refrigerant undercharge, line sizing errors, bad wire pulls, restricted airflow, and drain issues all trace back to decisions made on installation day. The homeowner’s strongest tool is the written guarantee the contractor provided, backed by specific documentation of the symptoms in writing. See our more guides & resources for additional help. Demand numbers, not reassurances. A heat pump installed correctly in Los Angeles should deliver rated efficiency from day one, cycle normally, and never leave you wondering whether the system is working right. If yours doesn’t, the installer owes you a return trip, and the guarantee says so.
Written by Marco Benitez, Owner at Dalton Heating & Air, serving Los Angeles since 2003.